I'm thrilled to be kicking off this year's Halloween blog hop with Craft Attitude! This week and next, you'll see lots of verrry scary Halloween projects from some fabulous designers.
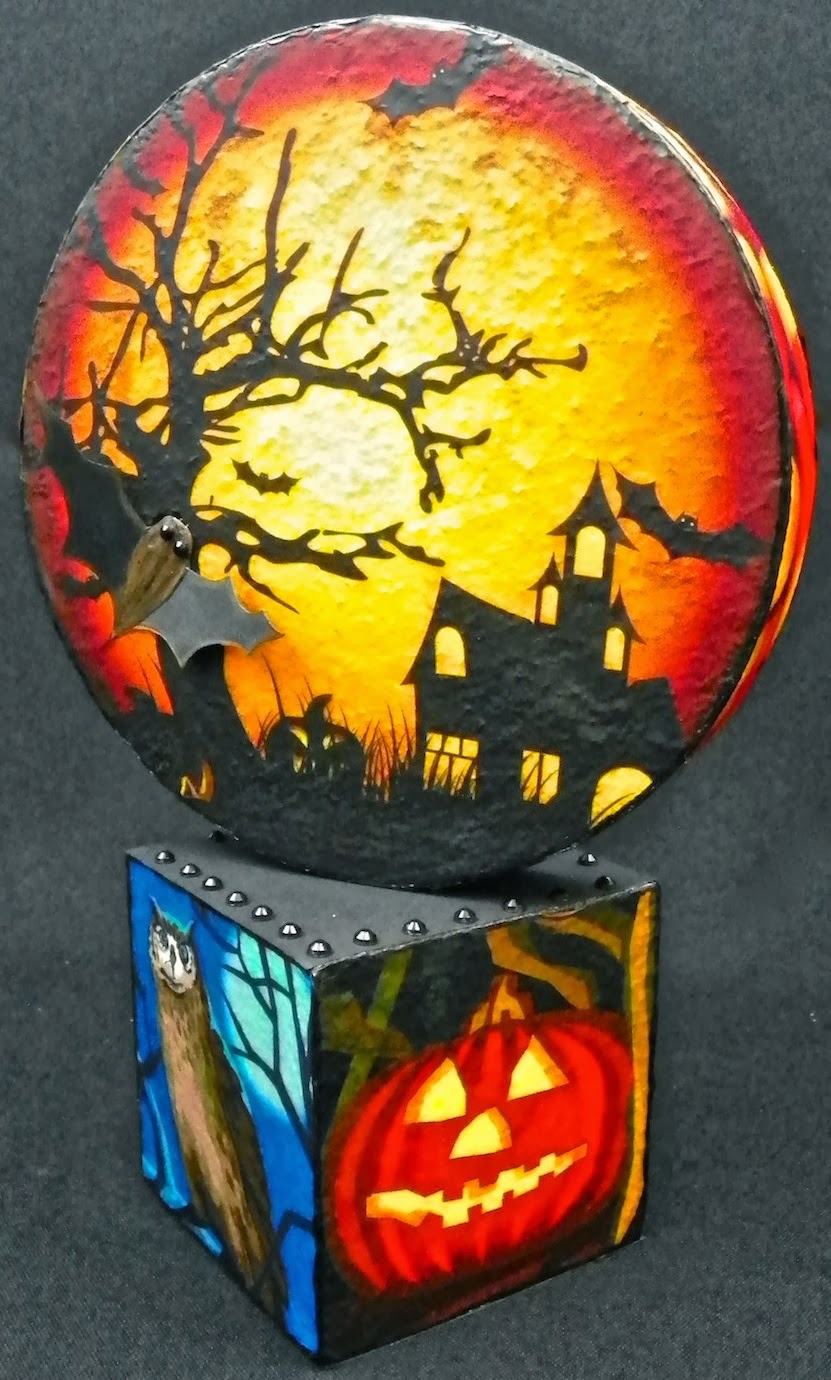
I made this freestanding "full moon" decoration using a variety of clip art. Set it on the party table, dinner table, coffee table, bookshelf, fireplace mantel - anywhere you need a little Halloween spirit.
Craft Attitude is a sheet of film that you print on your inkjet and then adhere to virtually any surface. It's a super fun and easy way to create with your favorite imagery! It looks especially cool on textured surfaces because the film settles in to all those nooks and crannies...you don't even know the film is there. It's like the surface came custom-printed with your images.
Here's how you can make this Halloween decoration for yourself - enjoy!
Supplies:
Craft Attitude Printable Film
Smoothfoam 3" cube
Smoothfoam 6" disc
Elmer's Craft Bond Extra-Strength Glue Stick
Paper trimmer
Scissors
Paint marker
Acetate
Black cardstock
Self-adhesive gems
Skewer
Computer and printer
(FTC disclosure: This blogger was compensated for this post)
Select or create the images you want to use - I used clip art from Microsoft - and print them on to the Craft Attitude film, following the package directions. You'll need images for four sides of the cube, both sides of the disc, plus the edge of the disc. Gang up as many images as you can to fill one sheet of film - I used Powerpoint to this.
Cut some acetate down to a 3" square to use as a crop guide, place it on the printed sheet and trace around it to get the desired crop. Cut out all the images to their final sizes.
Cover the surface of one side the Smoothfoam cube with the glue stick - be sure to get glue all the way out to the edges. Peel back the liner of the film on one corner of one image and position it, image side down, on to the surface of the cube. Rub the image down, then slowly peel off the liner, leaving the film adhered to the cube. Rub the image with your fingers to work out any creases or air bubbles if needed.
Repeat for the rest of the cube and the disc. Color the edges with a black paint marker to give each image a finished look - this also hides any of the white surface that might be peeking out.

Place the disc on top of the cube by putting the skewer into the pilot hole of the disc. Position the disc on the diagonal to the cube.
Add some self-adhesive gems to the top of the cube, and embellish the disc with little dimensional charms or die-cuts if you like.
Be sure to visit these designers' blogs to see what cute-n-spooky projects they create with Craft Attitude:
Wednesday, Oct. 2 - Theresa Cifali
Friday, Oct. 4 - Kristi Parker Van Doren
Monday, Oct. 7 - Jennifer Priest
Wednesday, Oct. 9 - Ann Butler
Friday, Oct. 11 - Heather Mann
For even more inspiration, follow Craft Attitude on Facebook!